Unlocking the Mystery of Multimeters: A Beginner's Guide to Measuring Electrical Quantities
Have you ever wondered how electricians or engineers are able to measure electrical quantities like voltage, current, and resistance? The answer lies in a handy tool called a multimeter. In this article, we'll demystify the world of multimeters and explain how they work, how to use them, and why they are essential for anyone working with electronics.
What is a Multimeter?
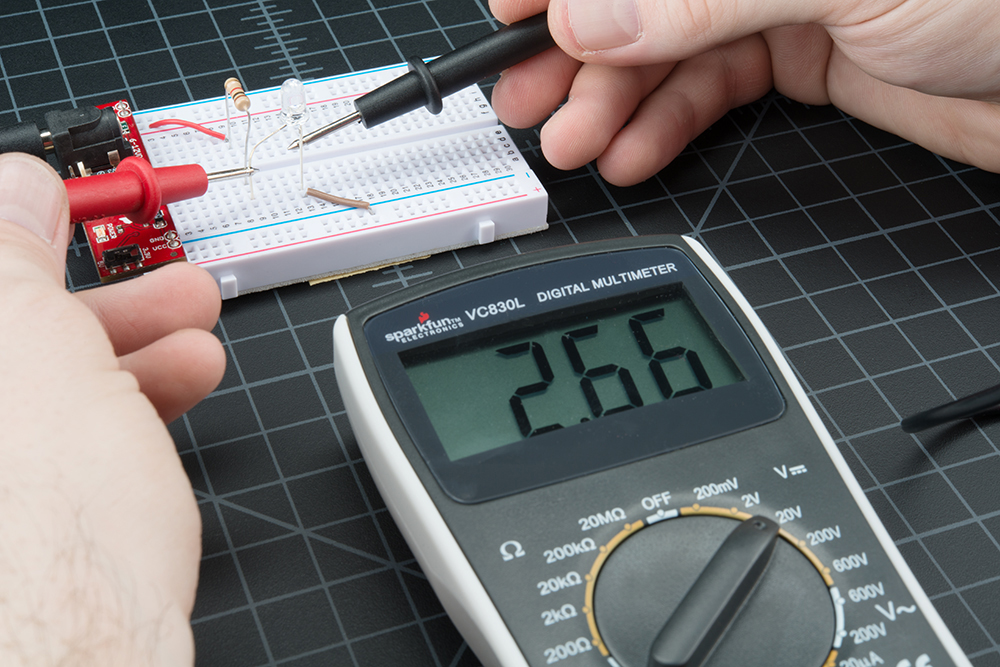
A multimeter, also known as a volt-ohm meter (VOM), is a handheld device that is used to measure electrical quantities like voltage, current, and resistance. It consists of three primary components: a display screen, a selection dial, and a set of probes or leads.
The display screen is where the measured values are displayed in digits, and the selection dial is used to switch between different modes or functions. The probes or leads are used to make contact with the circuit being measured.
How does a Multimeter Work?
A multimeter works by measuring the electrical properties of a circuit. When the probes or leads are connected to a circuit, the multimeter measures the voltage or current flowing through the circuit and displays the value on the screen.
The selection dial on the multimeter allows you to choose between different modes or functions. For example, you can use the voltage mode to measure the voltage across a battery, or the current mode to measure the current flowing through a wire.
In addition to measuring voltage and current, multimeters can also measure resistance, continuity, and even temperature. Some advanced multimeters can also measure capacitance, inductance, and frequency.
How to Use a Multimeter?
Using a multimeter may seem intimidating at first, but it is actually quite simple. Here are the basic steps to using a multimeter:
Step 1: Turn on the Multimeter
Most multimeters have a power button that needs to be pressed to turn the device on. Once the device is on, the display screen should light up, and the selection dial should be active.
Step 2: Set the Multimeter to the Correct Mode
The selection dial on the multimeter needs to be set to the correct mode or function for the measurement you want to make. For example, if you want to measure the voltage across a battery, you would set the multimeter to the voltage mode.
Step 3: Connect the Probes or Leads to the Circuit
The probes or leads on the multimeter need to be connected to the circuit you want to measure. This is done by touching the metal tips of the probes to the circuit.
It is important to make sure the probes are connected correctly. The red probe should be connected to the positive (+) side of the circuit, and the black probe should be connected to the negative (-) side of the circuit.
Step 4: Read the Measurement
Once the probes are connected, the multimeter should display the measured value on the screen. Make sure to read the measurement correctly and pay attention to the units being used (e.g., volts, amps, ohms, etc.).
Step 5: Turn off the Multimeter
After you have finished taking your measurements, turn off the multimeter to conserve the battery and prevent accidental damage.
Why is a Multimeter Essential?
A multimeter is an essential tool for anyone working with electronics. It allows you to measure the electrical properties of a circuit, which is necessary for troubleshooting and diagnosing problems.
For example, if you are trying to fix a broken electrical device, you may use a multimeter to determine if a particular component is faulty. You can measure the resistance of the component and compare it to the expected value to determine if it is working correctly.
A multimeter is also useful for testing circuits before you connect them to power. By measuring the resistance of a circuit, you can make sure that there are no short circuits or other problems that could cause damage when the circuit is powered on.
In addition to troubleshooting and testing, a multimeter is also essential for designing and building circuits. By measuring the voltage and current of different components, you can ensure that they are operating within their specified ranges and avoid damaging them.
Choosing the Right Multimeter
When choosing a multimeter, there are several factors to consider. The first is the type of measurement you will be making. If you only need to measure voltage and current, a basic multimeter will suffice. However, if you need to measure more advanced properties like capacitance or frequency, you will need a more advanced multimeter.
Another factor to consider is the range of the multimeter. Make sure to choose a multimeter with a range that is appropriate for the measurements you will be making. For example, if you need to measure high voltage, you will need a multimeter with a high voltage range.
Finally, consider the quality of the multimeter. A high-quality multimeter will provide more accurate measurements and last longer than a cheaper one. Make sure to read reviews and choose a reputable brand.
Conclusion
Multimeters may seem complicated at first, but they are an essential tool for anyone working with electronics. By measuring the electrical properties of a circuit, you can troubleshoot and diagnose problems, test circuits before powering them on, and ensure that components are operating within their specified ranges. When choosing a multimeter, make sure to consider the type of measurements you will be making, the range of the multimeter, and the quality of the device. With a little practice, using a multimeter will become second nature, and you'll wonder how you ever worked without one.
Labels: Interesting, science, Technology


0 Comments:
Post a Comment
Subscribe to Post Comments [Atom]
<< Home